
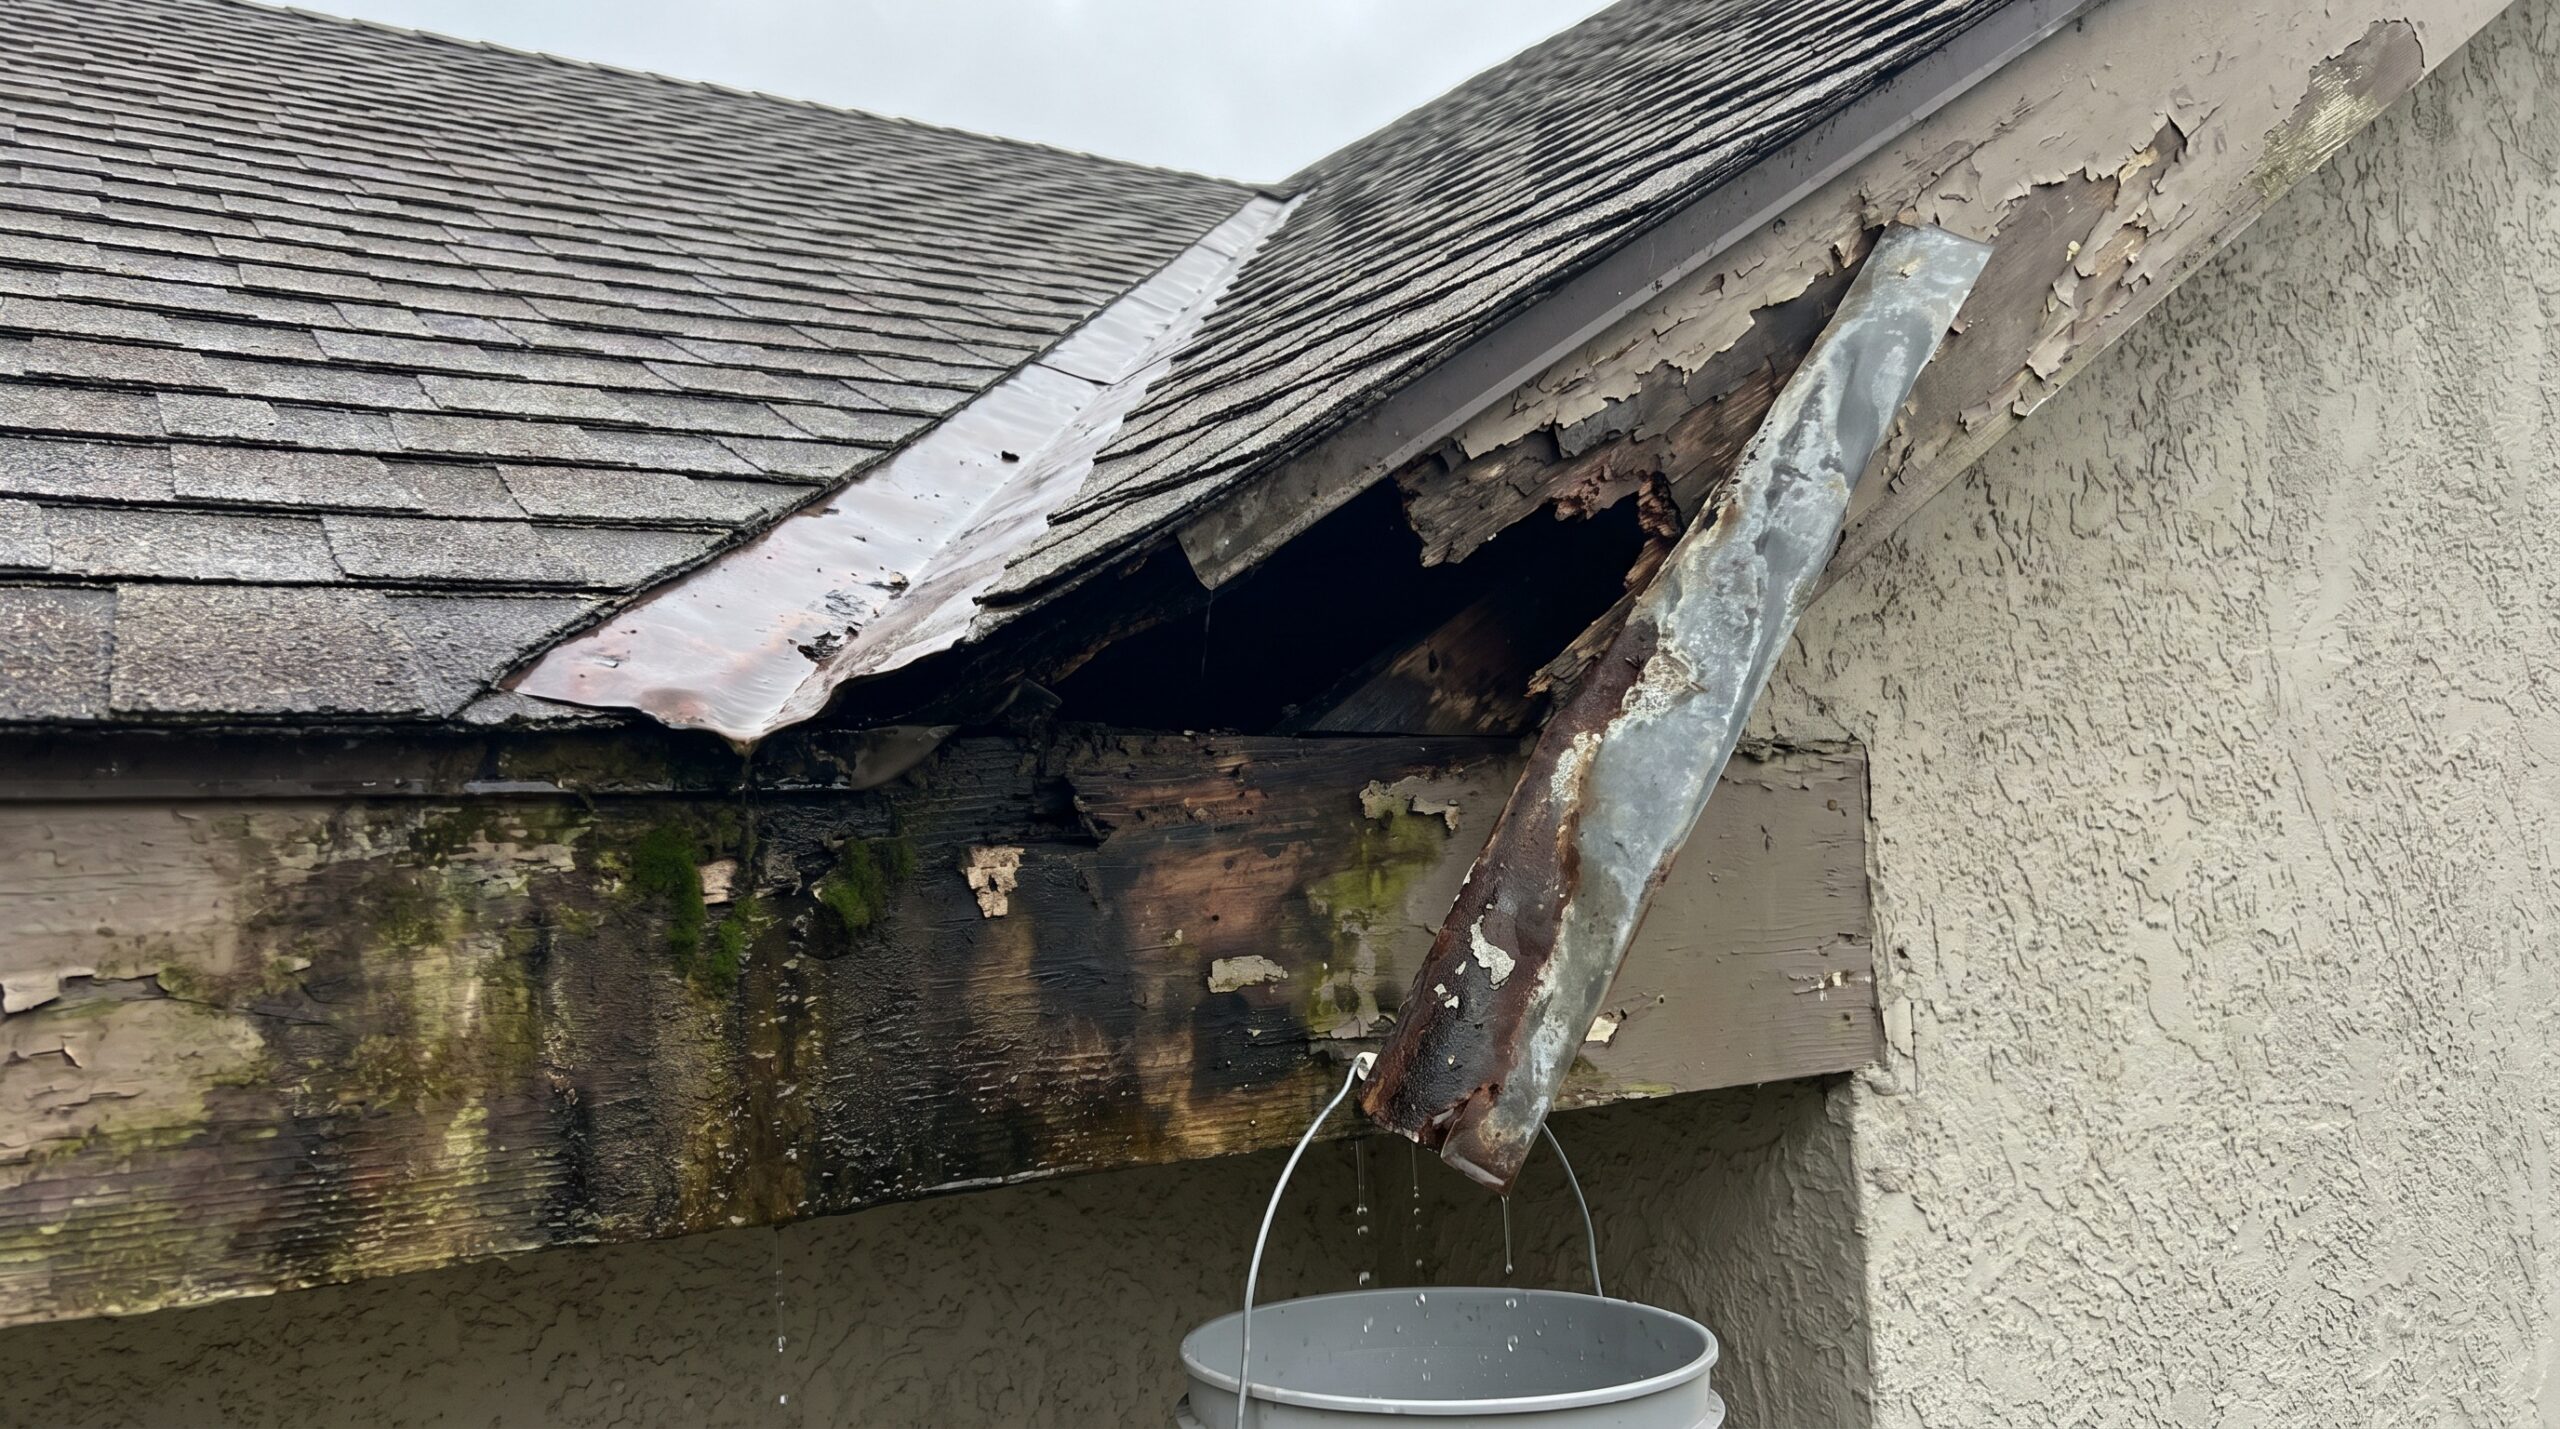
Water stains appearing on your interior walls near where the roof meets the house? Peeling paint or musty odors around dormers and sidewalls? These frustrating problems often point to one culprit: improperly installed roof-to-wall flashing details.
Roof-to-wall flashing is a specialized weatherproofing system that seals the critical junction where your horizontal roof surface meets a vertical wall. This thin, weather-resistant material—typically metal like aluminum or galvanized steel—creates a watertight barrier that directs rainwater away from vulnerable intersections.
Key Insight: According to building codes, proper roof-to-wall flashing must include both step flashing along the wall and kickout flashing at the bottom to direct water into gutters, preventing thousands of dollars in water damage.
Getting these details right prevents water intrusion that can lead to rotted framing, mold growth, and expensive structural repairs. This guide covers what roof-to-wall flashing is, why proper installation matters, the key components you need to know about, and when to call professionals like Peak and Valley Roofing for help.
What is roof-to-wall flashing and why does it matter
Roof-to-wall flashing serves as your home’s first line of defense against water infiltration at one of the most vulnerable points in your building envelope. Think of it like an umbrella that extends from your roof onto the wall, channeling water down and away from the intersection.
These critical areas include sidewalls where sloped roofs meet vertical surfaces, headwalls at the top of roof sections, dormers, and anywhere roofing materials transition to siding or masonry. Without proper flashing, even a small gap can allow water to seep behind your siding and into wall cavities.
The consequences of poor roof-to-wall flashing details are serious. Water intrusion leads to rotted sheathing and framing, compromised insulation, mold growth, and interior damage like peeling paint and damaged drywall. Some wall claddings like vinyl siding and fiber cement can mask evidence of water damage for years, making problems worse before you discover them.
In Northeast Ohio’s climate, where we experience heavy spring rains, winter freeze-thaw cycles, and occasional severe storms, proper flashing becomes even more critical. These weather patterns can exploit any weakness in your roof-to-wall connections, making quality installation essential for long-term protection.
Key components of effective roof and wall flashing systems
Understanding the main components of roof flashing systems helps you recognize proper installation and identify potential problems. The system works together like overlapping shingles, with each piece directing water to the layer below.
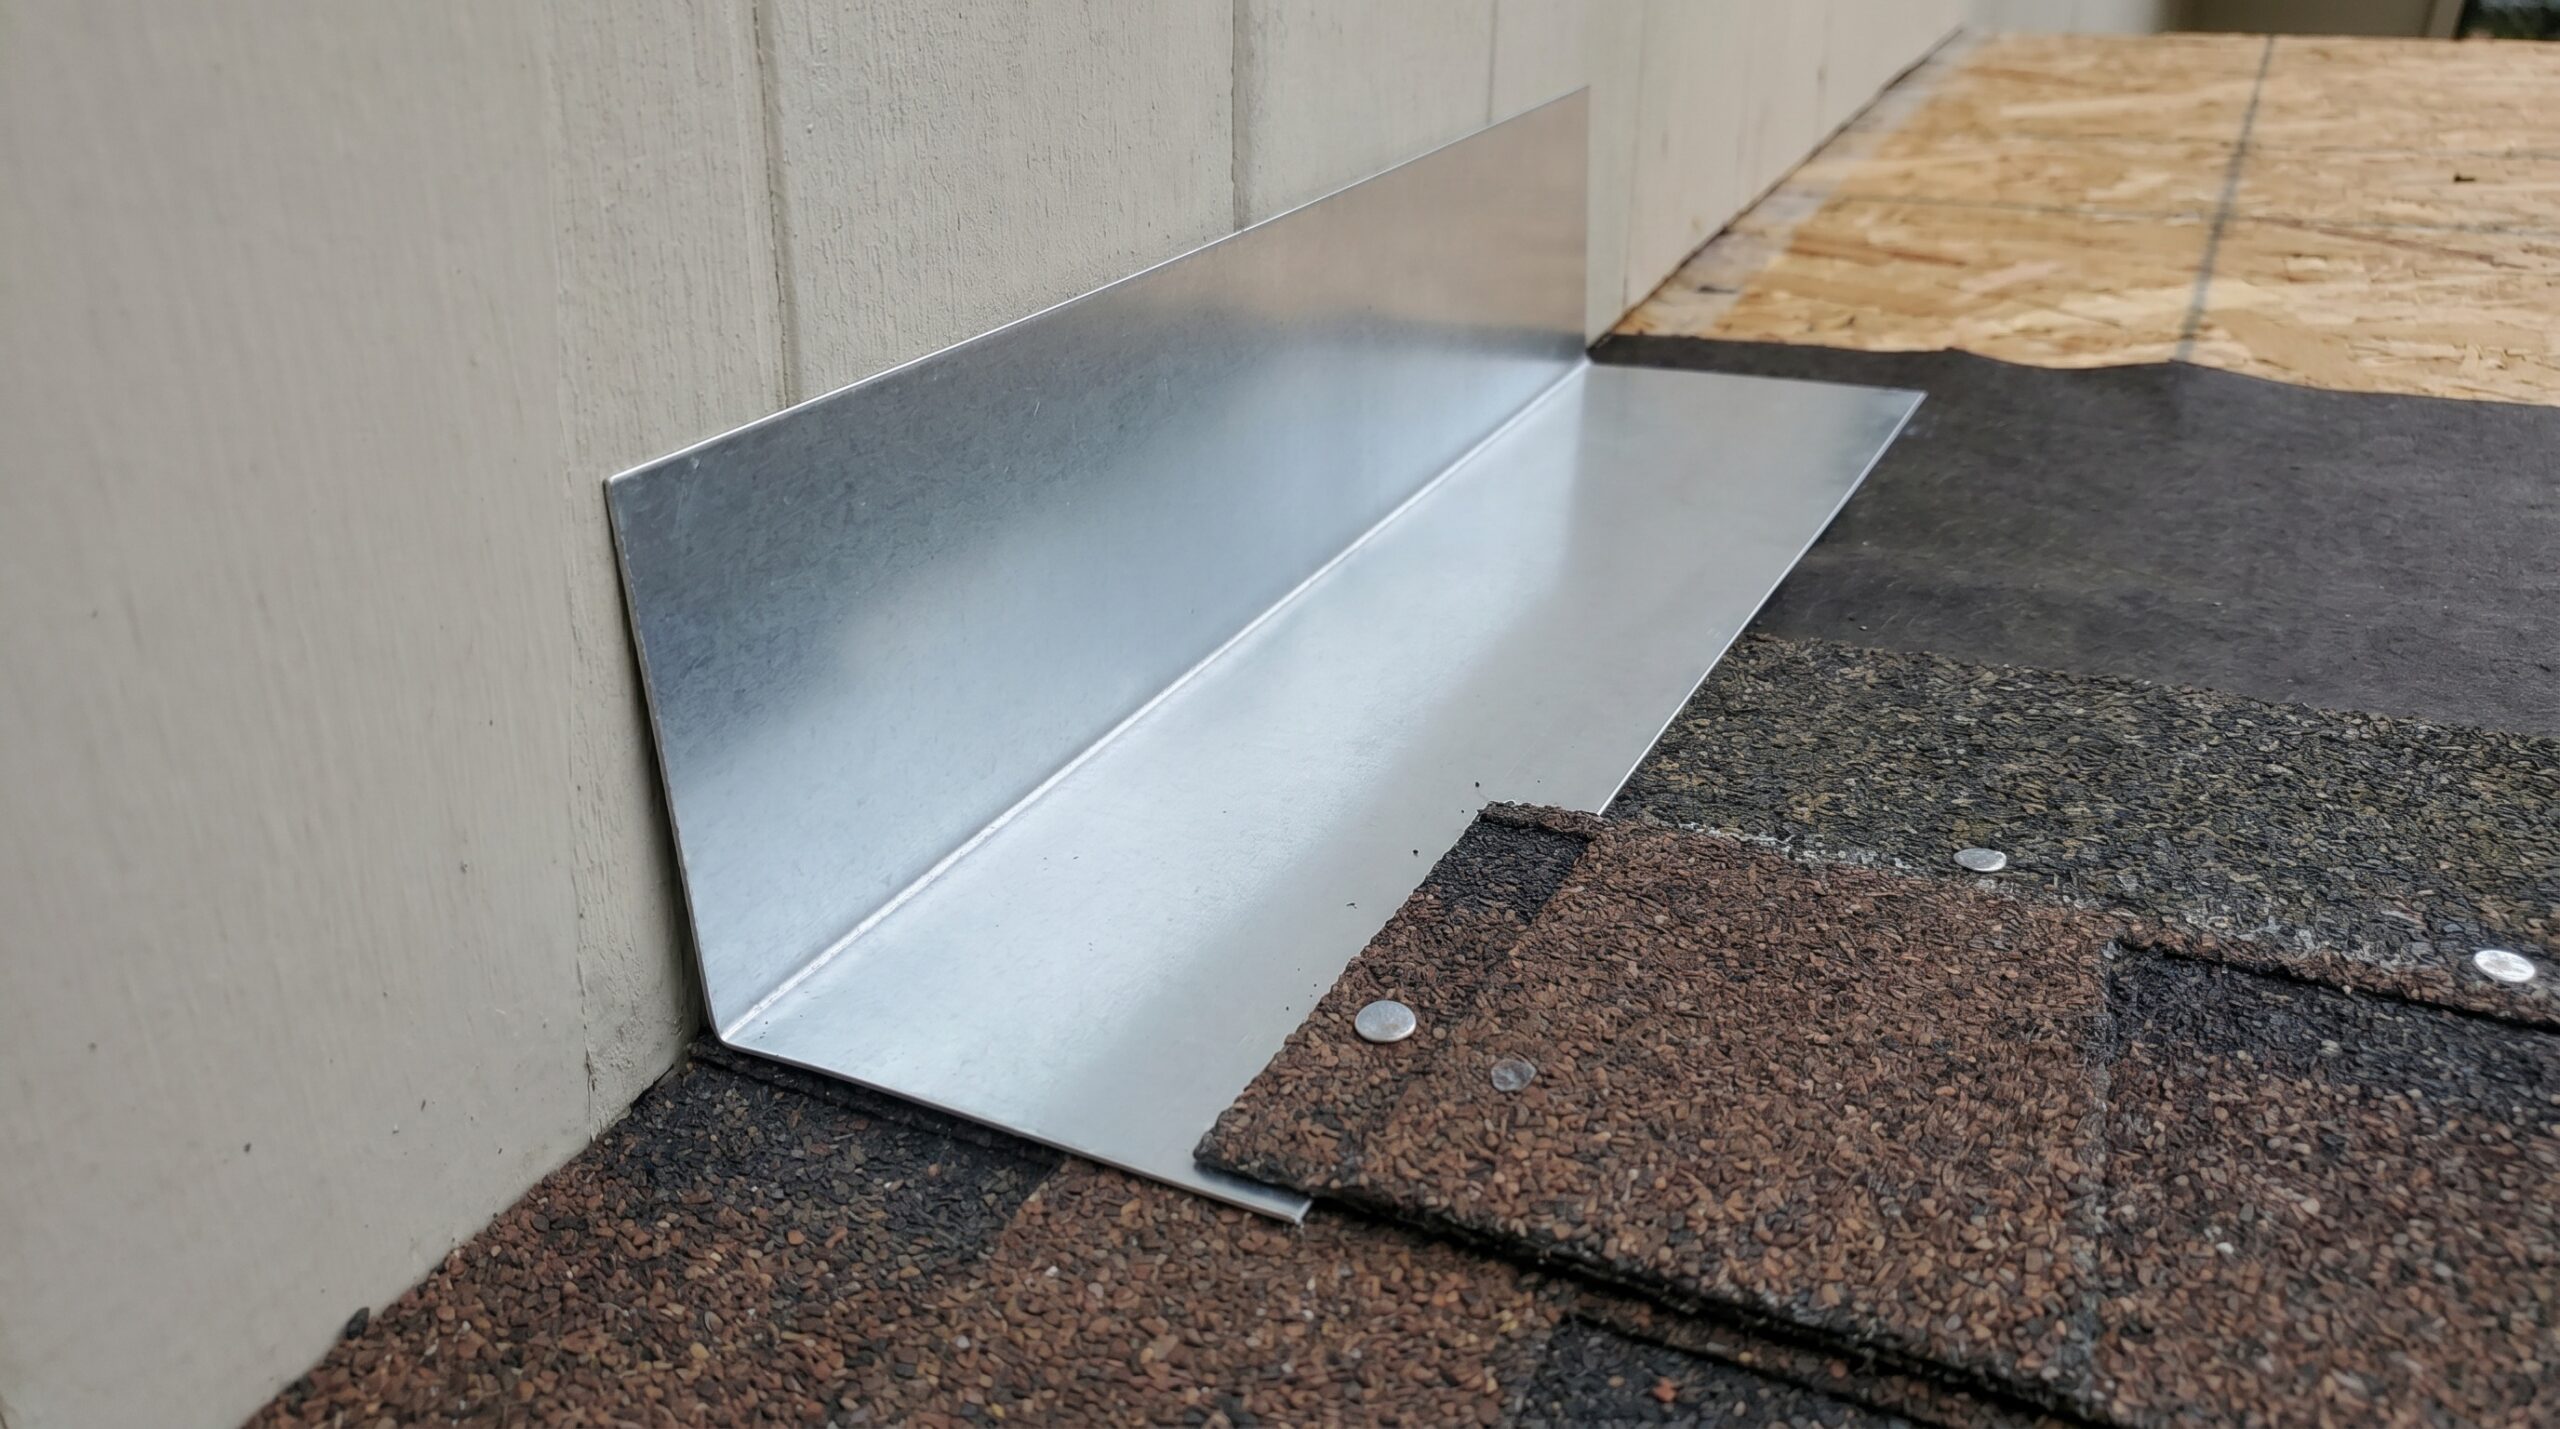
Step flashing forms the backbone of most roof-to-wall installations. These individual L-shaped metal pieces, typically 5 inches by 7 inches, are woven between each course of shingles along the wall. One leg lies flat against the roof surface under the shingles, while the other extends up the wall behind the water-resistant barrier.
Kickout flashing, also called diverter flashing, plays a crucial role at the bottom of roof-wall intersections. This specially shaped piece directs water flowing down the roof away from the wall and into your gutter system. Without kickout flashing, water streams down the exterior wall, saturating siding and potentially entering the building envelope.
Pro Tip: Continuous L-shaped flashing works better than step flashing for metal roofs and low-slope applications, while step flashing remains the standard for asphalt shingle installations.
Counter flashing provides an additional layer of protection by covering the top edge of step flashing where it meets the wall. This prevents wind-driven rain from getting behind the primary flashing and ensures proper water shedding down the wall surface.
Installation best practices for roof-to-wall flashing details
Proper installation follows a specific sequence that maintains the water-shedding principle throughout the roof and wall system. The process starts with installing roof underlayment and water-resistant barrier on the wall before any flashing goes in place.
Each piece of step flashing gets installed with its corresponding shingle course, creating overlapping layers that direct water downward. The flashing extends at least 4 inches up the wall and 4 inches onto the roof surface, with the wall leg positioned behind the house wrap or water-resistant barrier.
Fastening requires careful attention to avoid creating leak points. Nails or screws should penetrate the flashing only in areas that will be covered by the next overlapping piece. Never nail through exposed flashing surfaces where water can enter the fastener holes.
The integration with siding demands precision timing during construction. Wall cladding must be installed after flashing is in place, with proper clearances maintained between siding and roofing materials. A gap of at least 2 inches between siding and shingles prevents water wicking and allows for thermal movement.
| Flashing Type | Best Use | Key Advantage |
|---|---|---|
| Step Flashing | Shingle roofs | Flexible, follows roof contours |
| Continuous Flashing | Metal/membrane roofs | Fewer joints, easier sealing |
| Kickout Flashing | All roof-wall ends | Directs water to gutters |
Common mistakes and when to call professionals
Several installation errors can compromise even high-quality flashing materials. The most critical mistake involves missing or undersized kickout flashing at the bottom of roof-wall intersections. This allows water to stream down walls instead of flowing into gutters.
Improper overlap sequences create another common failure point. Each piece of step flashing must overlap the piece below it, and shingles must overlap the horizontal leg of each flashing piece. Reversing these overlaps creates pathways for water to flow backward into the building.
Relying too heavily on sealants instead of proper mechanical flashing details often leads to premature failure. While sealants play a supporting role, they should never serve as the primary water barrier at roof-wall intersections.
Warning: DIY flashing repairs can be dangerous due to steep roof pitches and fall risks. Complex installations involving multiple roof planes or extensive wall reconstruction typically require professional expertise.
Professional installation becomes necessary when dealing with complex roof geometries, multiple wall intersections, or when existing flashing has failed and caused structural damage. Peak and Valley Roofing brings years of experience handling challenging roof-to-wall details in the Cleveland area and can ensure your installation meets local building codes and manufacturer requirements.
As a family-owned company specializing in insurance restoration work, Peak and Valley Roofing understands how critical proper flashing is for preventing storm damage claims. Our team has seen firsthand how improper flashing installation can turn minor weather events into major insurance headaches for Rocky River and Cleveland area homeowners.
Signs that indicate you need professional help include visible water damage, soft or spongy wall sheathing around roof intersections, recurring leaks despite previous repairs, and situations where accessing the work area safely requires specialized equipment.
The investment in proper roof-to-wall flashing details pays dividends through prevented water damage, maintained structural integrity, and peace of mind during heavy storms. When installed correctly, quality flashing systems can protect your home for decades with minimal maintenance beyond periodic inspections and keeping gutters clean.